How To Install A DC EV Charger ?
Release time: 2026-01-03
How To Install A DC EV Charger
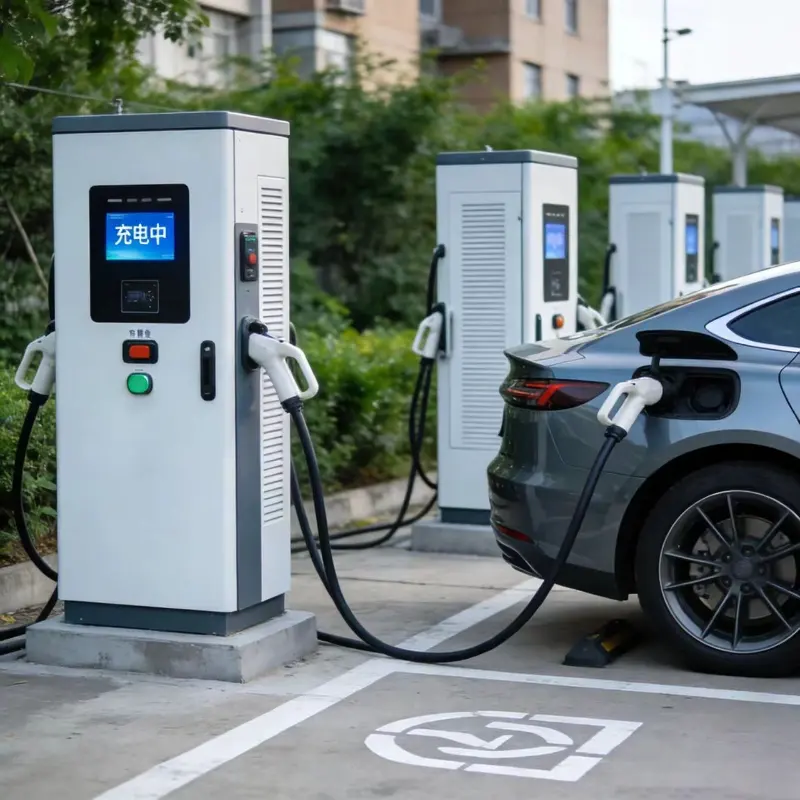
As electric vehicles become mainstream, installing a DC (Direct Current) fast charger has become a smart investment for businesses, fleet operators, and even residential complexes seeking to offer rapid charging solutions. Unlike Level 2 AC chargers, DC fast chargers deliver power directly to the EV’s battery, providing an 80% charge in 20–40 minutes—ideal for high-traffic locations or time-sensitive users.
However, DC EV charger installation is a technical process that requires careful planning, compliance with electrical codes, and professional expertise. This guide breaks down the key steps to ensure a smooth, safe, and successful installation.
- Conduct a Comprehensive Site Assessment
Before purchasing equipment, evaluate your location to confirm it can support a DC fast charger:
- Electrical Capacity Check: DC chargers require 3-phase power (400V–480V) and draw 30kW–350kW+ of power. Consult your utility company to assess if your grid connection, transformer, and electrical panel can handle the load—upgrades (e.g., new service panels, transformer扩容) may be necessary.
- Physical Site Evaluation: Choose a level, accessible area with pull-through parking (to avoid backing up) and sufficient space for the charger cabinet (typically 1–2m wide) and cable reach (DC cables are thicker/longer than AC). Ensure proper drainage to prevent water damage and verify the ground can support the charger’s weight (up to 500kg for cabinets).
- Regulatory & Zoning Compliance: Check local building codes, zoning laws, and HOA rules (for residential areas). Most regions require permits for electrical work and EV charger installations.
- Select the Right DC EV Charger Equipment
Choose hardware that aligns with your needs, budget, and future scalability:
- Power Output: Opt for 50kW–150kW for commercial use (suitable for most EVs) or 200kW+ (ultra-fast) for high-demand locations (e.g., highways, airports).
- Connector Compatibility: Prioritize chargers with global standards like CCS (Combined Charging System), CHAdeMO, or Tesla NACS (North America) to accommodate all EV models.
- Smart Features: Look for OCPP (Open Charge Point Protocol) compliance for remote monitoring, billing, and software updates. Additional features like RFID access control, mobile app integration, and weatherproofing (IP54+ rating) add value.
- Reliability & Warranty: Choose reputable brands with a minimum 2–5 year warranty on hardware and 1–3 years on parts/labor.
- Hire Licensed Professionals
DC charger installation involves high-voltage electrical work—DIY is strictly prohibited. Hire:
- A certified electrician with EV charging experience (preferably trained in DC fast charger installations).
- A licensed contractor for site preparation (e.g., concrete pouring, trenching, conduit installation).
- Collaborate with your utility company to coordinate power connection and meter installation (some utilities offer rebates for commercial EV charger installations).
- Complete Site Preparation
Prepare the location before equipment delivery:
- Trenching & Conduit: Dig trenches (1–1.5m deep) to run high-voltage cables, communication lines (Ethernet/fiber), and grounding wires from the electrical panel to the charger site. Use durable conduit (PVC or metal) to protect cables from damage.
- Concrete Pad Installation: Pour a reinforced concrete pad (minimum 1m x 1.5m x 10cm) to support the charger cabinet—ensure it’s level and cured before installation.
- Utility Connections: Coordinate with your utility to install a dedicated meter (for billing) and upgrade the service entrance if needed.
- Install & Wire the Charger
The installation process typically takes 1–3 days (depending on site complexity):
- Mount the Charger: Secure the cabinet to the concrete pad using anchor bolts. Ensure it’s positioned to allow easy access to connectors and maintenance panels.
- Electrical Wiring: Connect the charger to the main power supply, grounding system, and communication lines. Follow the manufacturer’s wiring diagram and local electrical codes (e.g., NEC Article 625 in the US, IEC 61851 in Europe).
- Test Safety Systems: Verify grounding, circuit breakers, and emergency shut-off switches (required within 1m of the charger) are functioning correctly.
- Inspect, Commission, & Activate
- Permit Inspections: Schedule inspections with local authorities to verify compliance with electrical codes, zoning laws, and safety standards.
- Commissioning: The installer will perform a full system test—including voltage checks, charging cycle tests with an EV, and software configuration (e.g., setting billing rates, user access).
- User Training: Learn how to operate the charger’s administrative dashboard, troubleshoot basic issues, and access customer support.
- Go Live: Once approved, activate the charger for public or private use. Promote it via your website, soci